Perfect Chocolate Cake with Mascarpone Cream
If you’re looking for a simple yet incredibly delicious chocolate cake, this recipe is exactly what you need. The cake turns out soft, fluffy, and deeply chocolatey, with a texture so tender that it practically melts in your mouth.
The best part? This cake uses a special but very simple mixing technique that guarantees a perfect result every time. Even better, you don’t need a mixer for the batter—everything can be mixed with a regular whisk.
To finish the cake, we’ll prepare a smooth and creamy mascarpone frosting with condensed milk, which complements the chocolate flavor perfectly and creates a dessert that tastes like it came straight from a professional bakery.
Despite its elegant appearance, the entire cake can be prepared in about 30 minutes of active work, making it perfect for birthdays, celebrations, or a cozy homemade dessert.
🛒 Ingredients
For the Chocolate Cake:
➤ 1½ cups (6.3 oz / 180 g) all-purpose flour
➤ 2 tsp (0.35 oz / 10 g) baking powder
➤ 2 tsp vanilla sugar
➤ 3 heaping tbsp (1 oz / 30 g) cocoa powder
➤ 3 large eggs (room temperature)
➤ ⅔ cup (4.6 oz / 130 g) sugar
➤ 3.4 fl oz (100 ml) milk
➤ 3½ tbsp (50 ml) vegetable oil
➤ 2½ tbsp (1.2 oz / 35 grams) melted butter
➤ ⅓ cup boiling water
For the Mascarpone Cream:
➤ 1.1 lb (500 g) mascarpone cheese
➤ ½ cup (5.3 oz / 150 g) sweetened condensed milk
Optional Decoration:
➤ White chocolate slices or shavings
🥣 Equipment
➤ Mixing bowls
➤ Whisk
➤ Sieve
➤ Spatula
➤ Baking sheet or rectangular baking pan
➤ Parchment paper
➤ Piping bag (optional)
👩🍳 Instructions
1. Prepare the Dry Ingredients
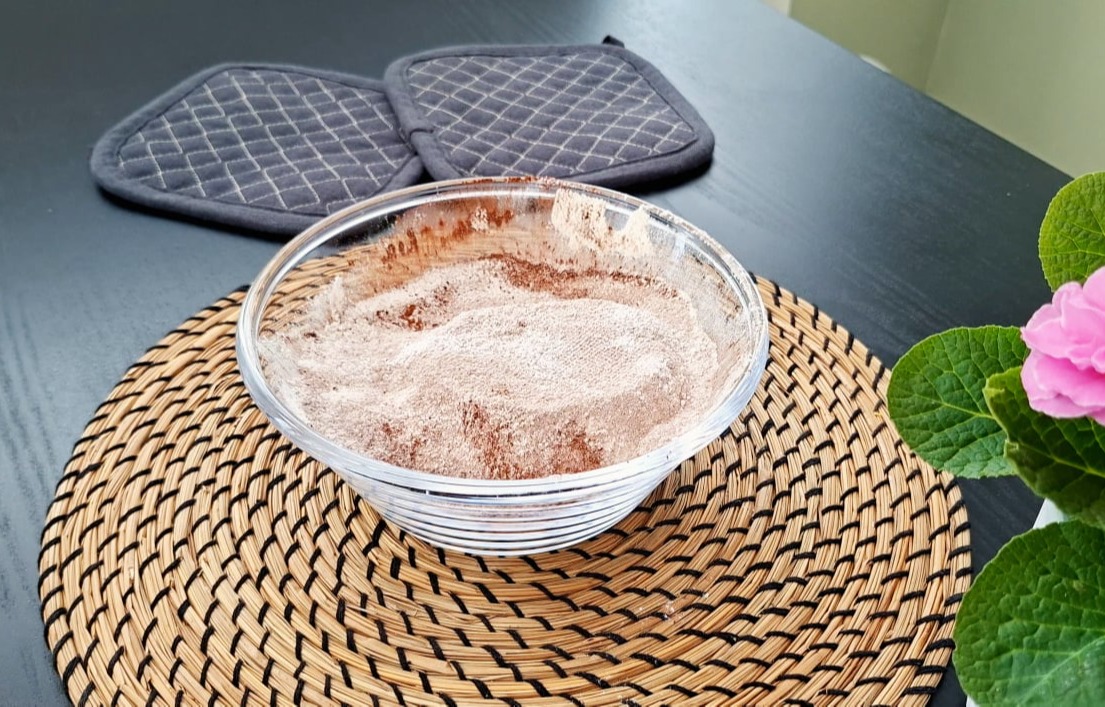
Start by sifting the dry ingredients, which helps create a lighter and smoother cake texture.
➤ Into a sieve add:
▸6.3 oz (180 g) all-purpose flour
▸2 tsp baking powder
▸2 tsp vanilla sugar
▸3 heaping tbsp (1 oz / 30 g) cocoa powder
➤ Sift everything into a bowl using a spatula.
➤ Set the dry ingredients aside.
💡Helpful Tip:
Sifting does more than remove lumps. It aerates the mixture, incorporating air that will help make the cake lighter and fluffier.
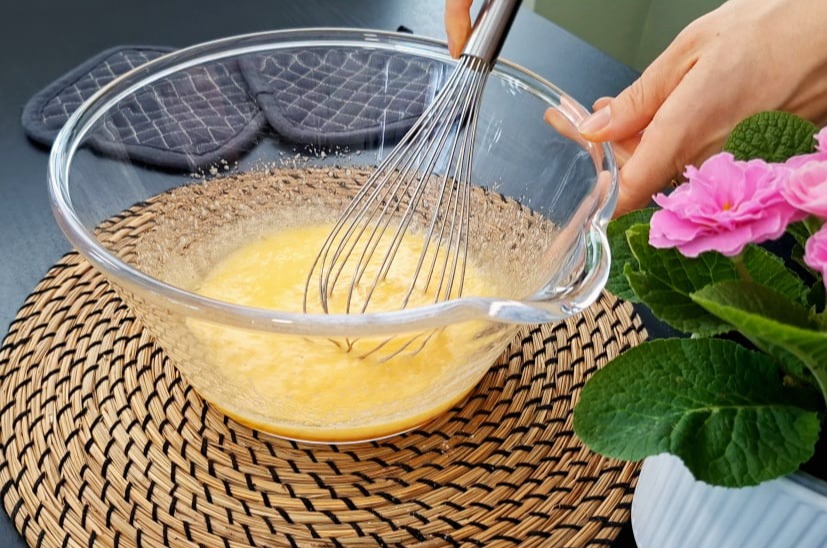
2. Whisk the Eggs and Sugar
➤ In a large bowl, crack 3 room-temperature eggs.
➤ Add ⅔ cup (4.6 oz / 130 g) of sugar
➤ Whisk the mixture for 2–3 minutes. You’ll notice that it becomes paler and slightly fluffy—this is exactly what we want.
👉 Mixing eggs with sugar properly creates a stable foam, which becomes the structural base of the cake. This step helps the cake stay soft and airy.
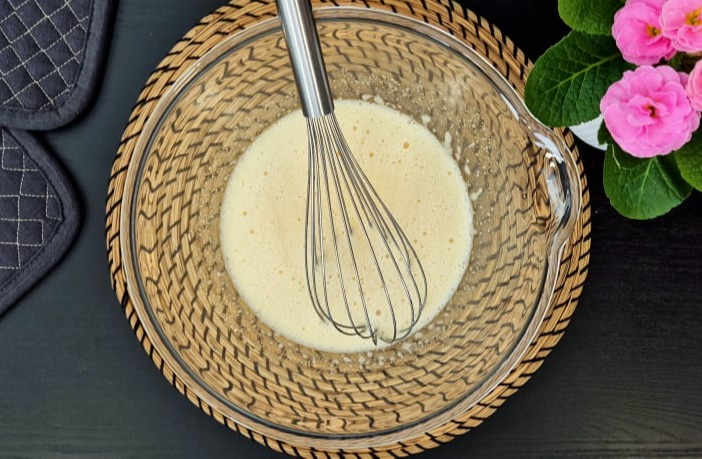
3. Add the Liquid Ingredients
➤ Now add the remaining wet ingredients:
▸3.4 fl oz (100 ml) of milk
▸3½ tbsp of vegetable oil
▸2½ tbsp (1.2 oz / 35 g) of melted butter (warm, not hot)
➤ Whisk until the mixture becomes smooth.
💡 Pro Tip:
Using two types of fat improves the cake texture. Vegetable oil keeps the cake moist. Butter adds a rich homemade flavor. This combination produces a cake that stays soft for days.
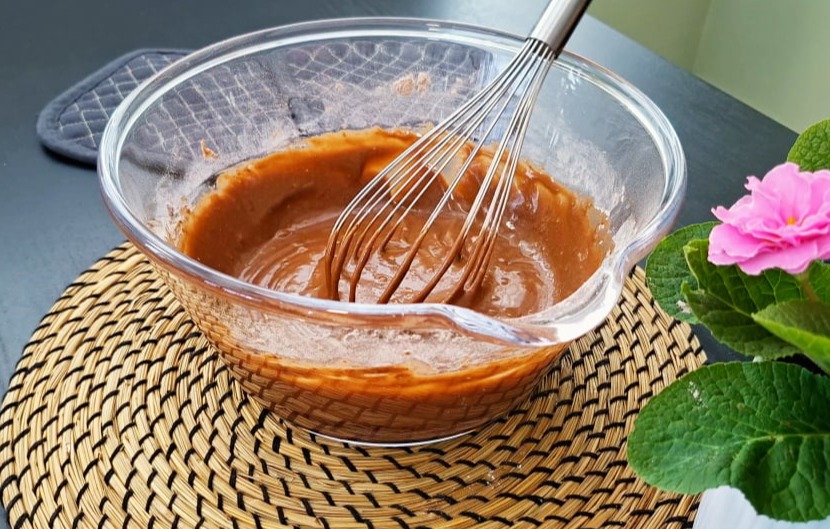
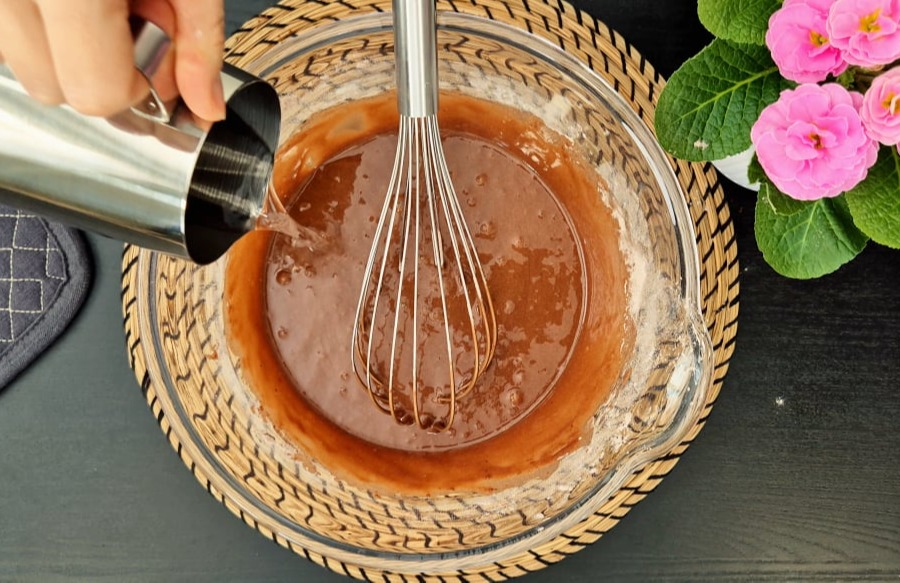
4. Combine Wet and Dry Ingredients
✨ Now comes an important technique:
➤ Add the dry ingredients to the wet mixture — not the other way around. This helps prevent lumps and ensures the baking powder activates correctly.
➤ Gently mix everything with a whisk until combined. The batter should become thick and smooth, similar to thick sour cream.
💡 The Golden Rule:
Do not overmix. Stir just until the ingredients are combined. Overmixing can make the cake dense.
5. Add Boiling Water
The final step for the batter is adding ⅓ cup of boiling water.
Pour the hot water into the batter and mix quickly.
The batter will become much thinner, almost like pancake batter. This is completely normal.
👉 Hot water “blooms” the cocoa powder, intensifying the chocolate flavor and creating a richer taste.
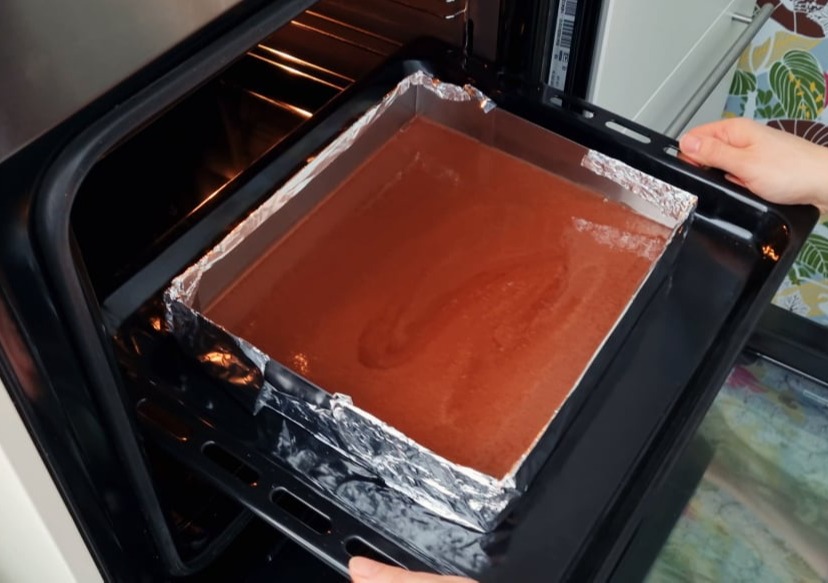
6. Bake the Cake
➤ Pour the batter into a rectangular baking pan.
💡If you don’t have a pan, you can also use a baking sheet lined with parchment paper.
➤ Level the surface with a spatula.
➤ Bake in a preheated oven at 180°C (350°F) for 25–30 minutes.
💡 Check for doneness using a toothpick. If it comes out clean or with a few moist crumbs, the cake is ready.
7. Prepare the Mascarpone Cream
While the cake is baking, prepare the frosting.
➤ In a large bowl add 1.1 lb (500 g) of mascarpone cheese
➤ Lightly soften it with a mixer on low speed for 10–15 seconds.
➤ Then add ½ cup of sweetened condensed milk
➤ Mix until smooth and creamy.
💡 Important Tip:
Do not overbeat the mascarpone. It can separate and turn into butter if mixed too long. Stop as soon as the texture becomes smooth and silky.
Allow the cake to cool completely before assembling.
👉 If the cake is still warm, the cream will melt and slide off the layers.
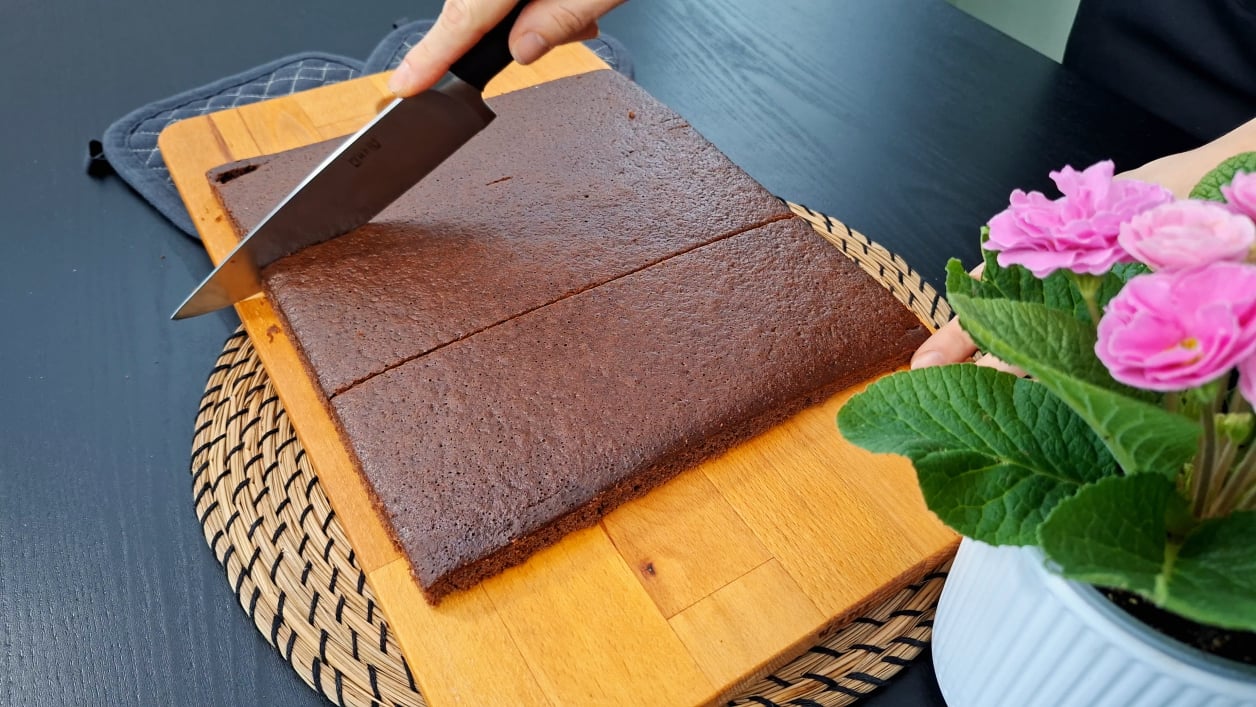
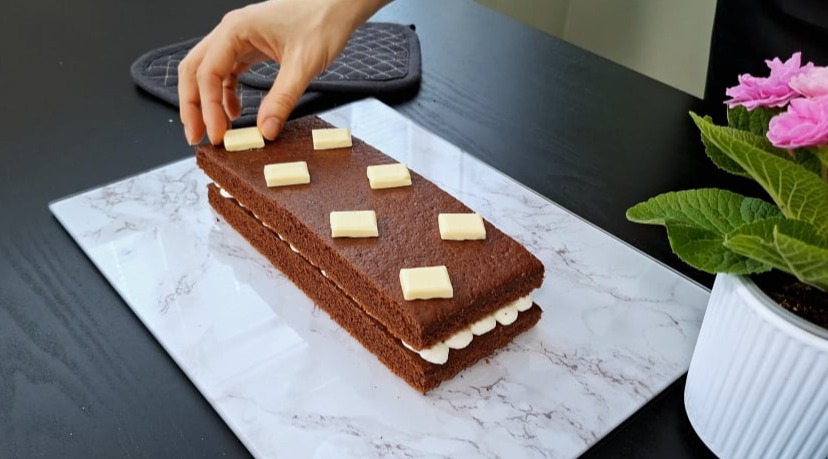
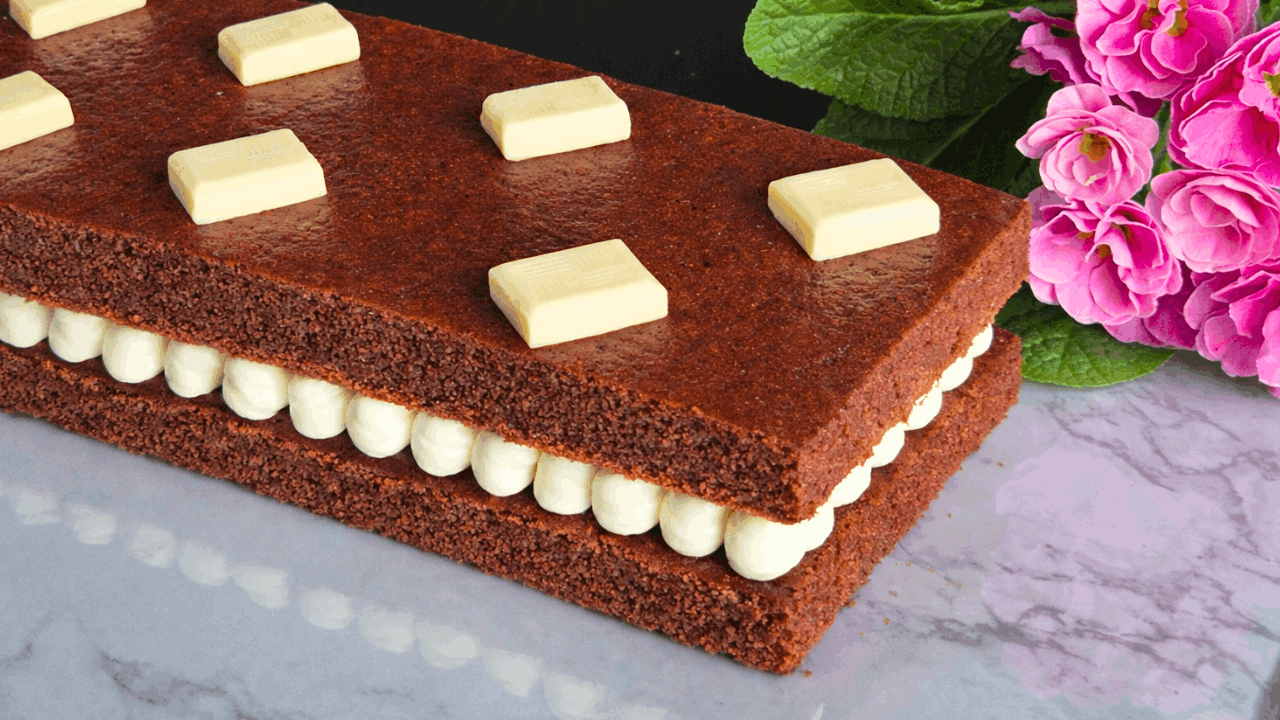
1️⃣ Once cooled, cut the cake into 2 or 3 equal layers.
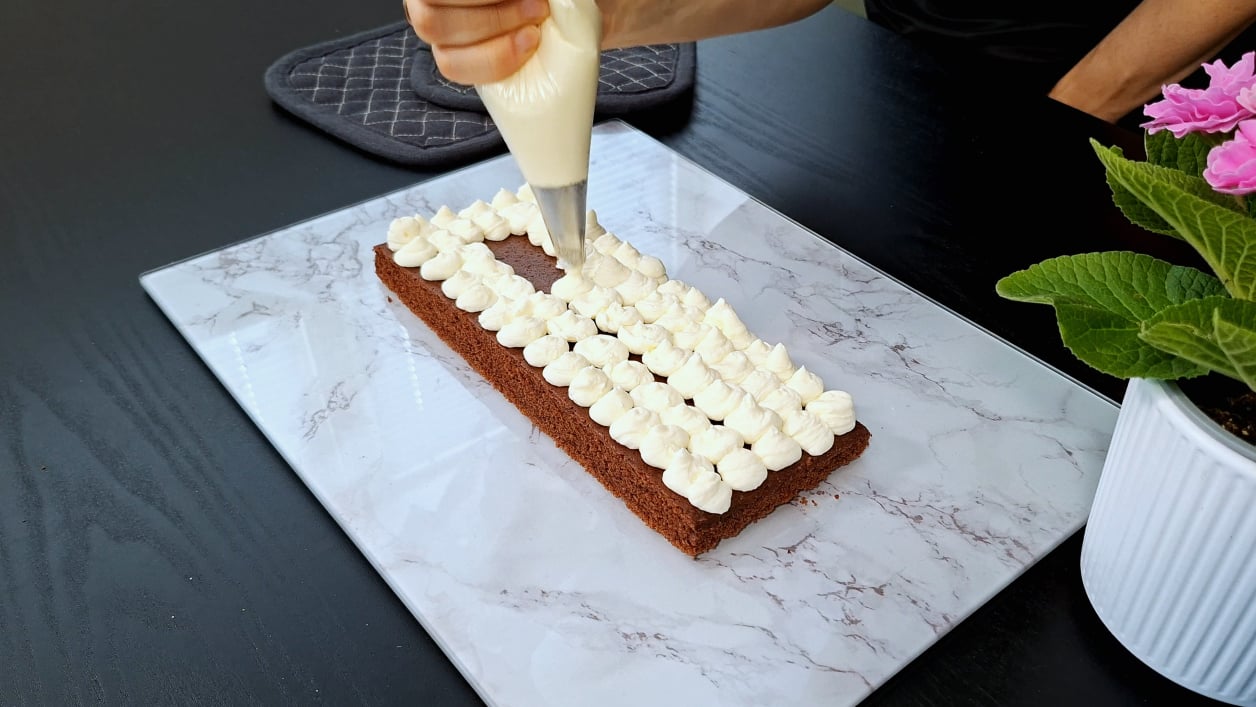
2️⃣ Spread the mascarpone cream between each layer.
💡Pro Tip:
For a professional look, put the frosting into a piping bag and pipe neat little "droplets" between each layer. This creates the effect of a professional bakery dessert, even though the effort is minimal.
9. Decoration
Finish with white chocolate slices or shavings.
The contrast between dark chocolate cake and white chocolate decoration creates a stunning presentation
This cake actually tastes even better the next day, so it’s a perfect dessert to prepare in advance for holidays, birthdays, or special This cake is perfect for birthdays, holidays, family gatherings, or simply when you crave a rich homemade dessert.
Try baking it at home—your family and friends will absolutely love it!

Free AI Website Builder